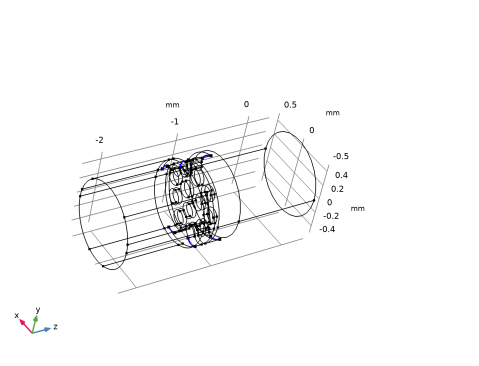
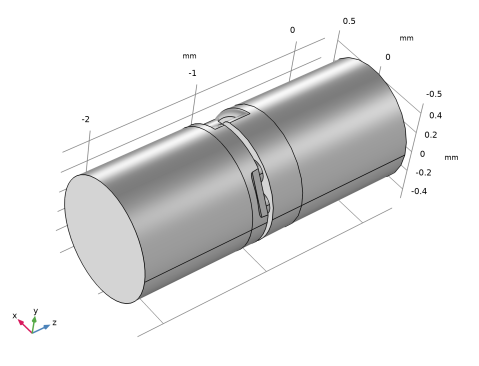
|
|
|
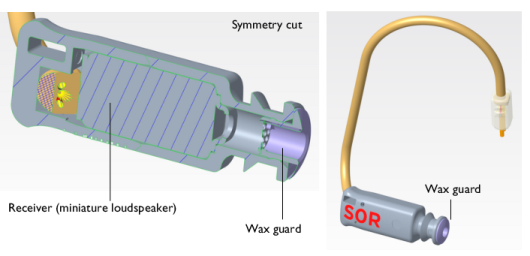
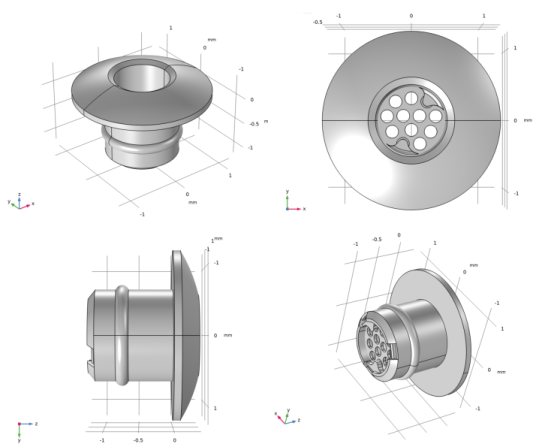









|
1
|
|
2
|
In the Select Physics tree, select Acoustics > Thermoviscous Acoustics > Thermoviscous Acoustics, Frequency Domain (ta).
|
|
3
|
Click Add.
|
|
4
|
Click
 Study. Study. |
|
5
|
|
6
|
Click
 Done. Done. |
|
1
|
|
2
|
|
3
|
|
4
|
Browse to the model’s Application Libraries folder and double-click the file wax_guard_acoustics_parameters.txt.
|
|
1
|
|
2
|
|
3
|
|
4
|
Browse to the model’s Application Libraries folder and double-click the file wax_guard_acoustics_parameters_tubes.txt.
|
|
1
|
|
2
|
In the Settings window for Variables, type Variables: Narrow Tube Transfer Matrix in the Label text field.
|
|
3
|
|
4
|
Browse to the model’s Application Libraries folder and double-click the file wax_guard_acoustics_variables.txt.
|
|
1
|
|
2
|
Go to the Add Material window.
|
|
3
|
|
4
|
Click the Add to Global Materials button in the window toolbar.
|
|
5
|
|
1
|
|
2
|
|
3
|
|
4
|
|
5
|
Browse to the model’s Application Libraries folder and double-click the file wax_guard_acoustics_geom_sequence.mph.
|
|
6
|
|
1
|
In the Model Builder window, under Component 1 (comp1) right-click Materials and choose More Materials > Material Link.
|
|
2
|
|
1
|
|
2
|
|
3
|
|
1
|
|
2
|
|
3
|
|
1
|
|
2
|
|
3
|
|
1
|
|
2
|
|
3
|
|
4
|
|
5
|
Click OK.
|
|
1
|
|
2
|
|
3
|
|
4
|
|
5
|
|
6
|
Click OK.
|
|
7
|
|
8
|
|
9
|
|
10
|
Click OK.
|
|
1
|
In the Model Builder window, under Component 1 (comp1) > Thermoviscous Acoustics, Frequency Domain (ta) click Thermoviscous Acoustics Model 1.
|
|
2
|
|
3
|
|
4
|
|
1
|
|
2
|
|
3
|
|
4
|
|
5
|
|
1
|
|
2
|
|
3
|
|
4
|
|
5
|
|
6
|
In the Settings window for Thermoviscous Acoustics, Frequency Domain, locate the Global Port Settings section.
|
|
7
|
|
1
|
|
2
|
|
3
|
Click the Custom button.
|
|
4
|
|
5
|
|
6
|
|
7
|
|
1
|
|
2
|
|
3
|
|
5
|
Click
 Build Selected. Build Selected. |
|
1
|
|
2
|
|
3
|
|
5
|
Click to expand the Corner Settings section. From the Handling of sharp edges list, choose Trimming.
|
|
6
|
|
1
|
|
2
|
|
3
|
|
4
|
|
5
|
|
6
|
|
1
|
|
2
|
|
1
|
|
2
|
|
3
|
Click
 Range. Range. |
|
4
|
|
5
|
|
6
|
|
7
|
|
8
|
Click Replace.
|
|
1
|
|
2
|
|
3
|
Click
 Add. Add. |
|
1
|
|
2
|
|
3
|
In the Model Builder window, expand the Study 1 > Solver Configurations > Solution 1 (sol1) > Stationary Solver 1 node.
|
|
4
|
Right-click Study 1 > Solver Configurations > Solution 1 (sol1) > Stationary Solver 1 > Suggested Iterative Solver (GMRES with DD) (ta) and choose Enable.
|
|
5
|
|
1
|
|
2
|
|
3
|
|
4
|
|
1
|
|
2
|
|
3
|
|
4
|
|
1
|
|
2
|
|
3
|
|
4
|
|
1
|
|
2
|
|
1
|
|
2
|
|
1
|
|
2
|
|
4
|
|
5
|
|
6
|
|
1
|
|
2
|
|
1
|
|
2
|
|
4
|
|
1
|
|
2
|
|
1
|
|
2
|
|
4
|
|
1
|
|
2
|
|
1
|
|
2
|
|
4
|
|
1
|
|
2
|
In the Settings window for Interpolation, type Interpolation: Receiver T-matrix in the Label text field.
|
|
3
|
|
4
|
Click
 Browse. Browse. |
|
5
|
Browse to the model’s Application Libraries folder and double-click the file wax_guard_acoustics_T_receiver.csv.
|
|
6
|
Locate the Data Column Settings section. In the table, enter the following settings:
|
|
8
|
|
10
|
|
11
|
|
13
|
|
14
|
|
16
|
|
17
|
|
19
|
|
20
|
|
22
|
|
23
|
|
25
|
|
26
|
|
28
|
|
29
|
|
31
|
|
32
|
|
33
|
|
1
|
|
2
|
In the Settings window for Interpolation, type Interpolation: Coupler T-matrix in the Label text field.
|
|
3
|
|
4
|
Click
 Browse. Browse. |
|
5
|
Browse to the model’s Application Libraries folder and double-click the file wax_guard_acoustics_T_coupler.csv.
|
|
6
|
Locate the Data Column Settings section. In the table, enter the following settings:
|
|
8
|
|
10
|
|
11
|
|
13
|
|
14
|
|
16
|
|
17
|
|
19
|
|
20
|
|
22
|
|
23
|
|
25
|
|
26
|
|
28
|
|
29
|
|
31
|
|
32
|
|
33
|
|
1
|
|
2
|
In the Settings window for Interpolation, type Interpolation: Microphone Impedance in the Label text field.
|
|
3
|
|
4
|
Click
 Browse. Browse. |
|
5
|
Browse to the model’s Application Libraries folder and double-click the file wax_guard_acoustics_mic_impedance.csv.
|
|
6
|
Locate the Data Column Settings section. In the table, click to select the cell at row number 1 and column number 1.
|
|
7
|
|
9
|
|
10
|
|
12
|
|
13
|
|
14
|
|
1
|
|
2
|
|
3
|
|
4
|
Click
 Browse. Browse. |
|
5
|
Browse to the model’s Application Libraries folder and double-click the file wax_guard_acoustics_measurements.csv.
|
|
6
|
Locate the Data Column Settings section. In the table, enter the following settings:
|
|
8
|
|
10
|
|
11
|
|
13
|
|
14
|
|
15
|
|
16
|
|
17
|
In the Show More Options dialog, in the tree, select the checkbox for the node General > Variable Utilities.
|
|
18
|
Click OK.
|
|
1
|
|
2
|
|
3
|
|
1
|
|
2
|
|
3
|
|
4
|
|
1
|
|
2
|
|
3
|
|
4
|
|
1
|
|
2
|
|
3
|
|
4
|
|
1
|
|
2
|
|
3
|
|
4
|
|
1
|
|
2
|
|
1
|
|
2
|
|
3
|
|
1
|
|
2
|
|
3
|
|
1
|
|
2
|
|
3
|
|
1
|
|
2
|
|
1
|
|
2
|
|
1
|
|
2
|
|
4
|
|
1
|
|
2
|
|
1
|
|
2
|
|
4
|
|
1
|
|
2
|
|
1
|
|
2
|
|
4
|
|
1
|
|
2
|
|
1
|
|
2
|
|
4
|
|
1
|
|
2
|
|
1
|
|
2
|
|
3
|
|
4
|
|
5
|
|
6
|
|
1
|
|
2
|
|
3
|
|
4
|
Locate the Plot Settings section.
|
|
5
|
|
6
|
|
7
|
|
1
|
|
2
|
|
4
|
|
1
|
|
2
|
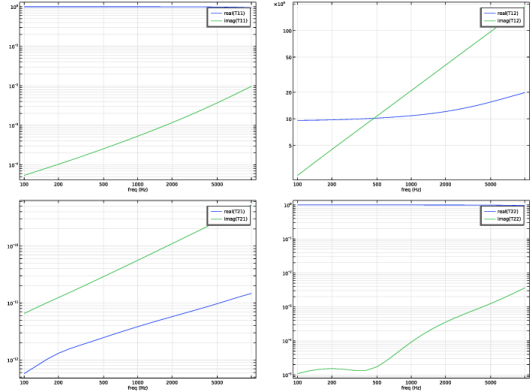
In the Settings window for Evaluation Group, type Evaluation Group: Wax Guard, T-Matrix (real/imag) in the Label text field.
|
|
1
|
|
2
|
|
3
|
|
4
|
Locate the Expressions section. In the table, enter the following settings:
|
|
5
|
|
1
|
|
2
|
|
3
|
|
4
|
|
1
|
|
2
|
|
3
|
|
4
|
|
5
|
|
1
|
|
2
|
|
3
|
|
4
|
|
5
|
|
1
|
|
2
|
|
3
|
Click
 Paste Selection. Paste Selection. |
|
4
|
|
5
|
Click OK.
|
|
1
|
|
2
|
|
3
|
|
4
|
|
5
|
|
1
|
|
2
|
|
3
|
Click
 Paste Selection. Paste Selection. |
|
4
|
In the Paste Selection dialog, type 7, 8, 10, 11, 13, 14, 17, 19, 31, 32, 34, 36, 42, 43, 89-92, 94, 96, 103, 104, 137-140 in the Selection text field.
|
|
5
|
Click OK.
|
|
1
|
|
2
|
|
3
|
|
4
|
|
5
|
Select the Show maximum and minimum values checkbox.
|
|
6
|
|
7
|
|
1
|
|
2
|
|
3
|
|
1
|
|
2
|
|
3
|
Click
 Browse. Browse. |
|
4
|
Browse to the model’s Application Libraries folder and double-click the file wax_guard_acoustics_cad_geometry.stp.
|
|
5
|
Click
 null. null. |
|
6
|
|
7
|
Click
 Build Selected. Build Selected. |
|
1
|
|
2
|
Click in the Graphics window and then press Ctrl+A to select both objects.
|
|
3
|
|
4
|
|
5
|
|
6
|
Click
 Build All Objects. Build All Objects. |
|
1
|
|
2
|
|
1
|
|
2
|
|
3
|
|
4
|
|
5
|
|
6
|
Click
 Build Selected. Build Selected. |
|
1
|
|
2
|
|
3
|
|
4
|
On the object ext1, select Domain 1 only.
|
|
5
|
Click
 Build Selected. Build Selected. |
|
1
|
|
2
|
|
3
|
|
4
|
On the object del1, select Domains 1 and 3–6 only.
|
|
5
|
|
1
|
|
2
|
On the object del2, select Boundary 3 only.
|
|
3
|
|
5
|
|
1
|
|
2
|
|
3
|
|
1
|
|
2
|
On the object ext2, select Domain 2 only.
|
|
3
|
|
1
|
|
2
|
|
1
|
|
2
|
|
3
|
|
1
|
|
2
|
|
3
|
|
4
|
|
5
|
|
1
|
|
2
|
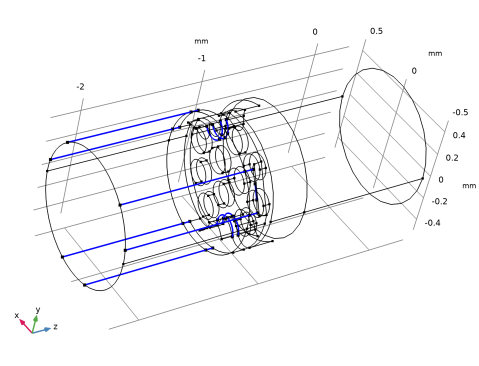
On the object ige1, select Edges 21, 23, 27, 45, 47, 61, 63, 80, 82, 85, 86, 95, 99, 130–134, 136, 140, 141, 174, 176, 184, and 186 only.
 |
|
3
|
|
4
|






 next to