You are viewing the documentation for an older COMSOL version. The latest version is
available here.
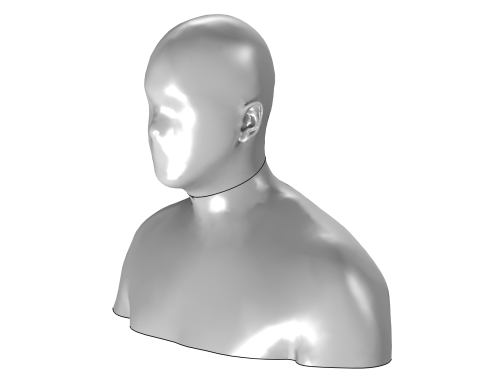
Use an Import (

) node to import a mesh or 3D printing file to the geometry, as shown in
Figure 7-10.
To add an Import operation, click
Import (

) in the
Geometry toolbar. You can also right-click the
Geometry node to add this node from the Model Builder context menu. Then enter the properties of the import feature in the
Import section of the
Settings window for the
Import node.
In the Source list choose
Mesh in 1D and 2D; and
Mesh or 3D printing file (STL, 3MF, PLY) in 3D. When choosing
Mesh or
Mesh or 3D printing file (STL, 3MF, PLY), you can import the geometry defined by a mesh of any meshing sequence, of the same space dimension, or a mesh file in the COMSOL Multiphysics format. In 3D, it is also possible to import a mesh defined by an STL, 3MF, or PLY file as a geometry. These files, which represent 3D surface meshes and are often used for 3D printing and additive manufacturing, can be used as a basis for creating a volumetric mesh for a single geometry domain. In addition, files with a NASTRAN, VRML (3D only), or sectionwise format are supported.
In all cases, you need to specify the mesh or file to import. Then click Import to bring in the geometry or mesh to use as a part of the geometry in the geometry sequence.
For import of a mesh, choose one of the available meshing sequences (from other model components of the same dimension) or mesh parts from the Mesh list. Use the
Go to Source button (

) to move focus to the meshing sequence or mesh part that you selected. If you choose
None, you can click
Browse (

)to locate a mesh or STL file or specify it in the
Filename field. You can also click the downward arrow beside the
Browse button and choose
Browse From (

) to open the fullscreen
Select File window. Click the downward arrow for the
Location menu (

) to choose
Show in Auxiliary Data (

) to move to the row for this file in the
Auxiliary Data window,
Copy Location (

), and (if you have copied a file location)
Paste Location (

). If you import an STL or NASTRAN file, for example, clicking
Import also creates a
Mesh Part node of the same dimension as the geometry component with an
Import subnode under
Global Definitions to make it easy to reuse the imported mesh as a geometry part.
For 3D printing file formats, you can change a number of properties when you have selected the file type. To import the file, click the Import button (

). If you have changed some property, the software automatically reimports the file when you click a build button. If you have changed the source file, you need to explicitly click the
Import button to read the modified file.
The Relative simplification tolerance is relative to the dimensions of the entire geometry and specifies a global limit for how much the mesh can be modified. The
Defect removal factor is relative to the local feature size, as estimated by the algorithm, and is combined with the global limit to produce a limit for how much the mesh can be modified at a certain location. If the mesh contains many defects that you want to remove, you could try to increase the value of the
Defect removal factor. If the mesh describes the desired geometry with high accuracy, you may want to decrease this factor instead.
The Form solids from surface objects check box is selected by default to create solid geometry objects from watertight surface mesh objects from, for example, an STL file. If you do not want or need solid geometry objects, clear this check box.
Select the Resulting objects selection check box to create predefined selections (for all levels — objects, domains, boundaries, edges, and points — that are applicable) in subsequent nodes in the geometry sequence. To also make all or one of the types of resulting entities (domains, boundaries, edges, and points) that the objects consist of available as selections in all applicable selection lists (in physics and materials settings, for example), choose an option from the
Show in physics (
Show in instances if in a geometry part;
Show in 3D in a plane geometry under a work plane in a 3D component) list:
All levels,
Domain selection,
Boundary selection,
Edge selection, or
Point selection. The default is
Domain selection, which is suitable for use with materials and physics defined in domains. For use with a boundary condition, for example, choose
Boundary selection. These selections do not appear as separate selection nodes in the model tree. Select
Off to not make any selection available outside of the geometry sequence. From the
Color list, choose a color for highlighting the resulting objects selection. See
Selection Colors.
Select the Individual objects selections check box to create predefined selections (for all levels — objects, domains, boundaries, edges, and points — that are applicable) in subsequent nodes in the geometry sequence for each individual object in the geometry file and for each relevant entity level. To also make all or one of the types of resulting entities (domains, boundaries, edges, and points) that the objects consist of available as selections in all applicable selection lists (in physics and materials settings, for example), choose an option from the
Show in physics (
Show in instances if in a geometry part) list:
All levels,
Domain selection,
Boundary selection,
Edge selection, or
Point selection. The default is
Domain selection, if available, which is suitable for use with materials and physics defined in domains. For use with a boundary condition, for example, choose
Boundary selection. These selections do not appear as separate selection nodes in the model tree. Select
Off to not make any selection available outside of the geometry sequence.
Select the Construction geometry check box to make the resulting objects available only in the feature’s geometry sequence. For more information, see
Construction Geometry.
|
|
|
•
|
See Head and Torso HRTF Computation: Application Library path Acoustics_Module/Tutorials,_Pressure_Acoustics/head_torso_hrtf.
|
|