|
|
|
|
1
|
|
2
|
Click
|
|
1
|
|
2
|
|
3
|
Click
|
|
4
|
|
5
|
Click
|
|
6
|
|
1
|
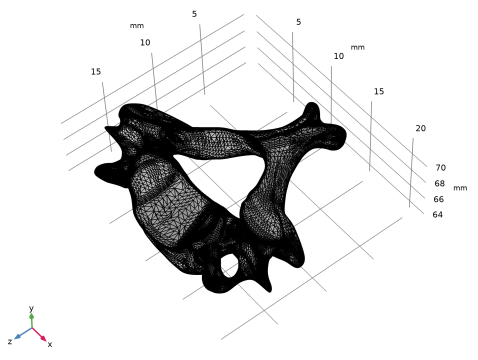
In the Model Builder window, expand the Global Definitions>Mesh Parts>Mesh Part 1>Import 1 node, then click Information.
|
|
2
|
|
3
|
|
4
|
|
5
|
|
6
|
|
7
|
|
8
|
|
9
|
|
1
|
|
2
|
|
3
|
|
4
|
|
1
|
|
2
|
Expand the Information node and click on the second Information1 node. In the Settings window, you find information that the operation was unable to delete two edges. Make sure both edges are selected in the list.
|
|
3
|
Click the
|
|
4
|
|
5
|
|
1
|
|
2
|
|
3
|
|
4
|
In the list, select 1 (the large face of the vertebra).
|
|
5
|
|
6
|
|
7
|
Close the Selection List window.
|
|
1
|
|
2
|
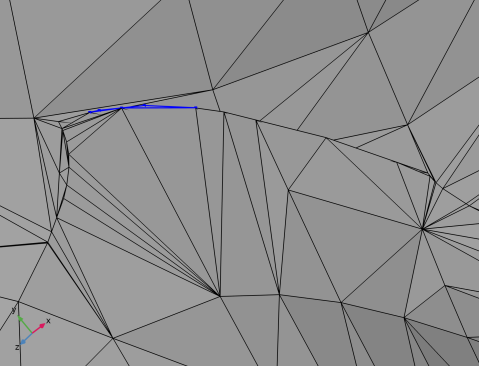
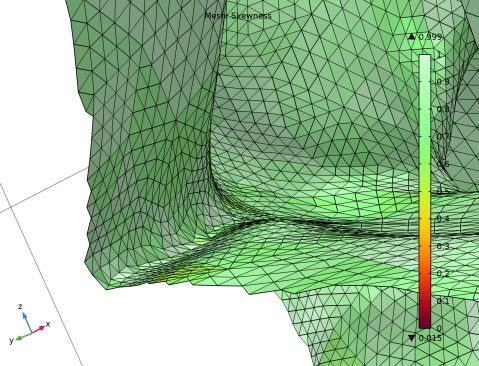
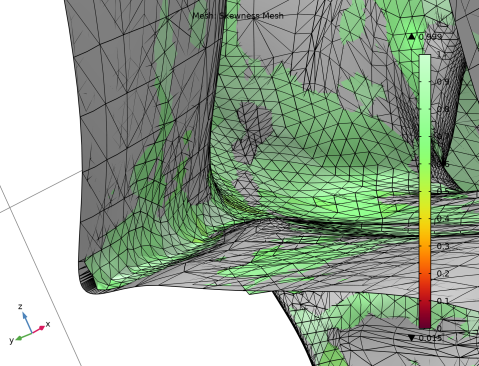
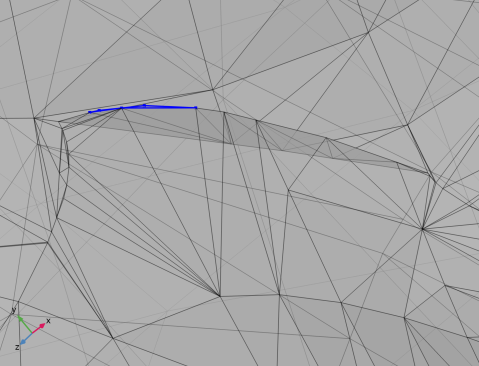
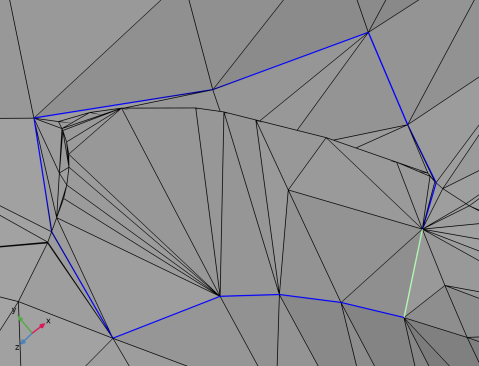
Select mesh edges around the fold by clicking them in the Graphics, similar to what is shown in the image below. The selection is most easily done with transparency off. If there are mesh edges on the opposite side of the view or are located inside a closed mesh face, it is recommended to use a Clip Plane or to hide boundaries in the mesh to reach those mesh edges. The selected edges can differ from the ones selected in the figure, as long as the edges form a closed loop, include the fold, and delimit only a small region around the fold. The last requirement is important when generating a new mesh face that follows the original mesh as close as possible.
 |
|
3
|
In the Settings window for Create Edges, click
|
|
1
|
|
3
|
|
1
|
|
3
|
|
4
|
Clear the Create domains check box to avoid getting further Information nodes about intersecting elements.
|
|
5
|
|
1
|
|
2
|
Click in the Graphics window and then press Ctrl+A to select both boundaries.
|
|
3
|
|
4
|
|
1
|
|
2
|
|
3
|
|
4
|
|
5
|
|
1
|
|
2
|
|
3
|
|
1
|
|
2
|
|
1
|
|
2
|
Select the object imp1 only, in other words the object for the imported vertebra.
|
|
3
|
|
4
|
|
5
|
|
6
|
|
7
|
Click the
|
|
1
|
|
2
|
Select the object rot1 only.
|
|
3
|
|
4
|
|
5
|
|
6
|
|
1
|
|
2
|
|
3
|
|
4
|
|
5
|
|
6
|
|
7
|
|
8
|
|
9
|
|
1
|
|
2
|
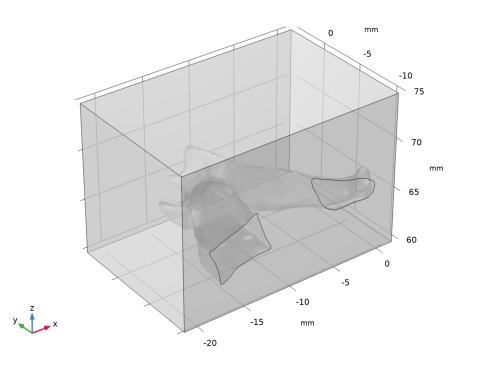
Select the object blk1 only (the block).
|
|
3
|
|
4
|
|
5
|
Select the object rot2 only (the vertebra).
|
|
6
|
|
7
|
|
8
|
|
1
|
|
2
|
|
1
|
|
2
|
|
3
|
|
1
|
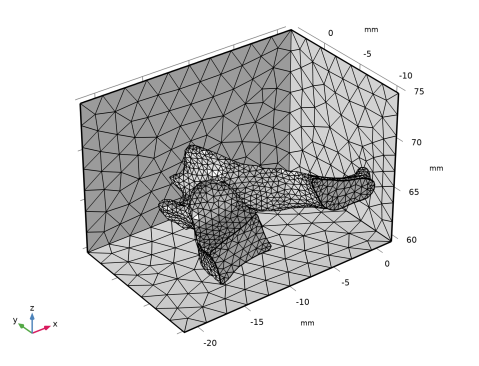
In the Model Builder window, under Component 1 (comp1)>Mesh 1 right-click Size and choose Build Selected.
|
|
1
|
|
1
|
|
2
|
|
3
|
Click the Custom button.
|
|
4
|
|
5
|
|
6
|
|
1
|
In the Model Builder window, under Component 1 (comp1)>Mesh 1 right-click Free Tetrahedral 1 and choose Build All to once again build the mesh on the domains.
|
|
2
|
|
3
|
|
4
|
|
5
|
|
6
|
|
7
|
|
1
|
|
2
|
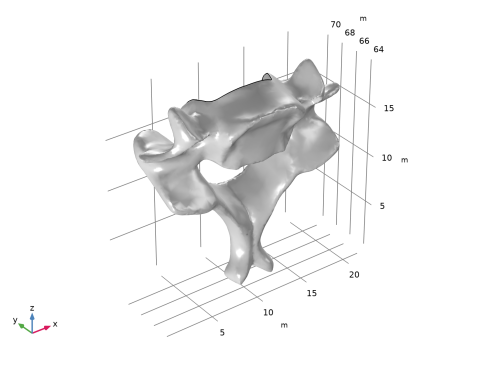
Right-click Global Definitions>Mesh Parts>Mesh Part 1 and choose Create Geometry to reimport the vertebra into a new Component.
|
|
1
|
|
3
|
|
1
|
|
2
|
|
3
|
|
4
|
|
5
|
|
6
|
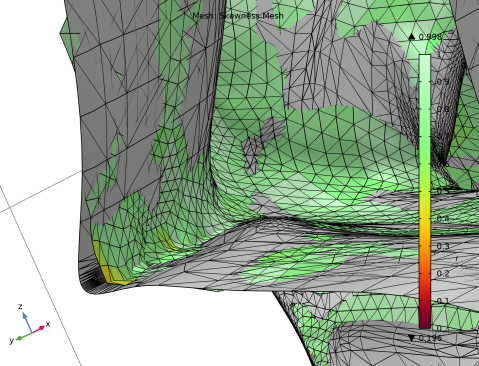
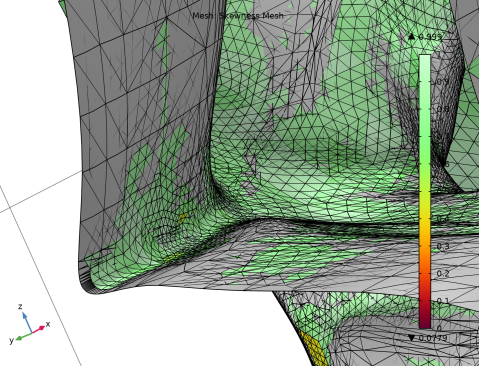
In the Mesh toolbar, click
|
|
1
|
|
2
|
|
3
|
|
4
|
|
1
|
|
2
|
|
3
|
|
1
|
|
2
|
|
3
|
|
1
|
|
2
|
|
3
|
|
4
|
|
5
|
|
1
|
|
2
|
|
3
|
|
4
|
|
1
|
|
2
|
|
1
|
|
2
|
|
3
|
|
4
|
|
1
|
|
2
|