Using Work Planes
Creating 3D Geometries From 2D Work Planes and 3D Faces
In addition to creating 3D geometries directly using 3D geometric primitives, it is also possible to form 3D geometries based on 2D cross sections (2D geometries) created in work planes or faces in the existing 3D geometry. A work plane is a 2D plane oriented anywhere in the 3D space. Quick options make it easy to create a work plane that is, for example, parallel to any of the main Cartesian planes or to a face or edge in an existing 3D geometry. See Work Plane for more information about the settings.
There are several methods to create 3D solid objects from 2D sections or faces. In addition, you can use a 2D section as an “embedded” surface in the 3D geometry.
See Electric Sensor: Application Library path COMSOL_Multiphysics/Electromagnetics/electric_sensor.
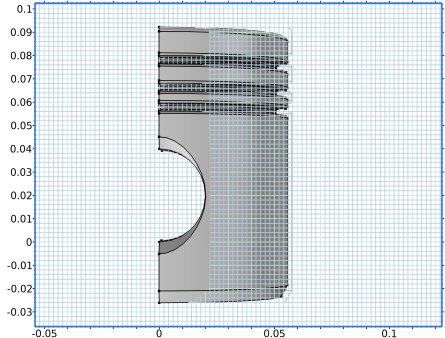
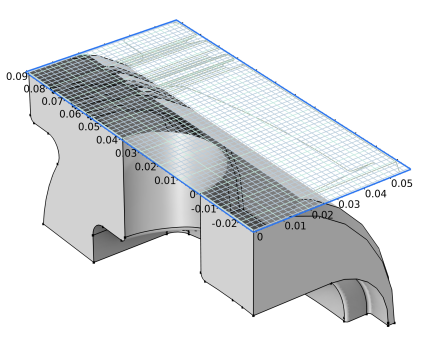
Use the instructions to practice building the geometry, which includes Work Plane, Rectangle, Ellipse, Union, Compose, Extrude, and Block features.
Drawing on a 2D Work Plane in 3D
When using a Work Plane () node to define 2D objects in 3D (for example, to extrude into a 3D object), the 3D projection settings enable you to draw on the work plane in 3D. These instructions provide an example. When the View work plane geometry in 3D check box is selected in the Settings window for the Plane Geometry node () under the Work Plane node, two additional buttons are available in the Graphics window — the Align with Work Plane button () and the Work Plane Clipping button (). The Sketch and Work Plane toolbars are also available for use. The upside of the work plane (defined by the plane’s normal axis) look blue; otherwise, it looks yellow (when using the standard color themes). Those colors help you understand which side of the plane that you are looking at.
1
Add a 3D Component and either leave it empty or add a geometry (for example, a Sphere).
2
In the Geometry toolbar, click Work Plane (or right-click Geometry 1 and select Work Plane.
3
Under Work Plane click the Plane Geometry node, click the Go to Plane Geometry () button in the Settings window, or click the Select Work Plane () menu in the Geometry toolbar and select an existing work plane.
4
Under Visualization, select the View work plane geometry in 3D check box, as shown in Figure 7-13.
Figure 7-13: The Graphics window displaying the Work Plane Geometry when the View work plane geometry in 3D check box is selected.
5
The geometry displays in the Graphics window. See Figure 7-14 for an example.
-
Click the Align with Work Plane button () to rotate and move the camera to see the work plane from the top down.
-
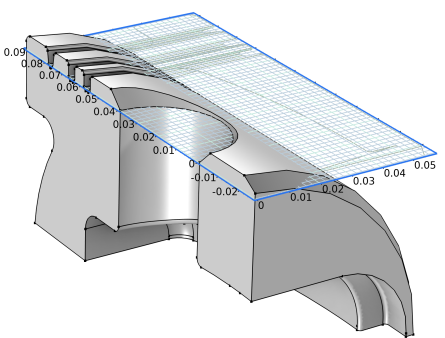
Click to toggle the Work Plane Clipping button () on and off. When on, use it to cut away all geometries above the work plane and make it easier to draw when objects are overlapping within the work plane. The clipping is not done when looking at the work plane from the side.
6
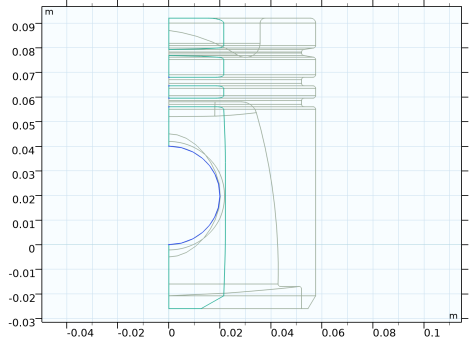
Under In-plane visualization of 3D geometry, specify how to visualize 3D objects in the work plane (as colored curves and points) by selecting one or more of the following check boxes (all of them are selected by default):
-
Coincident entities (blue) — Show edges and points (in a pure blue color) that lie in the work plane.
-
Intersection (green) — Show the intersection of 3D geometry and the work plane (in green).
-
Projection (gray) — Show the projection of all edges and points onto the work plane (in gray).
Figure 7-14: The Graphics window displaying the Work Plane Geometry when the View work plane geometry in 3D check box is not selected.