|
1
|
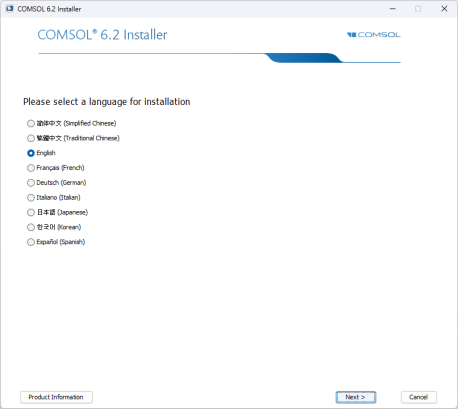
Select your language for the installation and click Next. You might also need to install fonts for the languages that you want to use when running COMSOL.
|
|
-
|
Click New COMSOL 6.2 Installation and proceed to Step 3 (License Page).
|
|
-
|
Click Add/Remove Products and Reinstall and proceed to Step 5 (Platform Page) to change or repair an existing installation. For example, use Add/Remove Products and Reinstall to add or remove documentation files for installed products, or to add or remove a product that your license includes.
|
|
-
|
Click Change License and proceed to Step 3 (License Page) to update the license of an existing installation. Use this option when COMSOL is installed and you get a new license file. The installer will remove products not licensed any more and let you go through the Add/Remove Products procedure to add or remove products for the new license. If your trial license has expired, you can use the Change License option to reenable a paid license.
|
|
-
|
Click Uninstall COMSOL 6.2 to remove an existing installation. For instructions on this option, see Removing (Uninstalling) the COMSOL Installation.
|
|
|
|
-
|
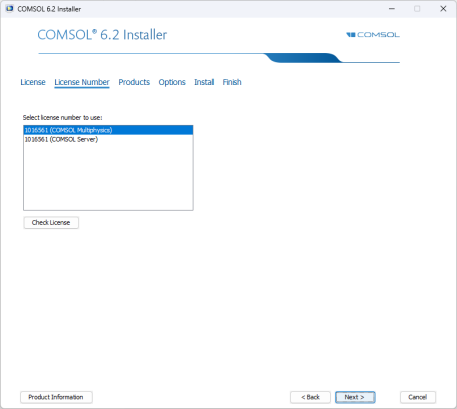
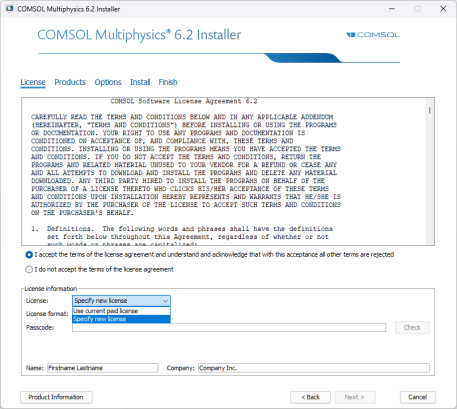
Passcode: Use this option for a Single-User Trial License or Class Kit License. Enter your passcode, which is a case-sensitive series of characters and numbers with a form similar to FFFFFFFFFFFF-TYUS-123456-1234567-123456789.
|
|
-
|
License file: Use this option for any type of regular paid-for license installation. Enter the path to a license file or click Browse to select the file license.dat. This file is sent to you by a COMSOL representative, typically by email.
|
|
-
|
Port number and Hostname: Use this option if your license administrator has given you a port number and hostname for a license manager for COMSOL that is running on your organization’s network. Enter the Hostname of the server running the license manager and its license manager port number.
|
|
-
|
Three-server redundancy: Use this option if your license administrator has given you three port numbers and hostnames for the three-server redundancy license manager option. Enter the hostnames and license server port numbers of the three-server redundant configuration.
|
|
4
|
Click Next.
|
|
-
|
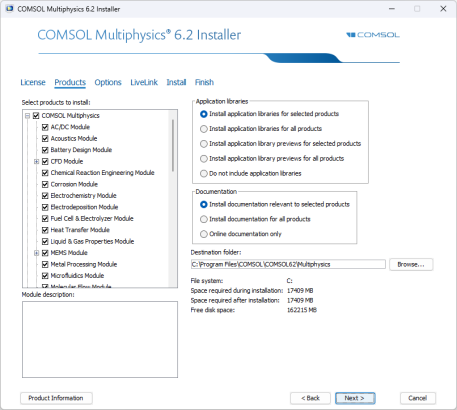
Install application libraries for selected products (the default) to install the application libraries for the licensed products that you have selected.
|
|
-
|
Install application libraries for all products to install the application libraries for all COMSOL products.
|
|
-
|
|
-
|
|
-
|
Do not include application libraries to not install any application libraries. Selected applications can be downloaded via Application Library Update.
|
|
-
|
Install documentation relevant to selected products (the default) to install the documentation for the licensed products that you have selected. For some products, documentation for other relevant products is also installed, so that you get access to documentation for functionality included in the licensed products but covered in other products’ documentation.
|
|
-
|
Install documentation for all products to install the documentation for all COMSOL products. You can then view and search all COMSOL documentation, even for products not included in your license.
|
|
-
|
Online documentation only to not install any documentation. You can still view documentation and access context help using online documentation provided by COMSOL, but no documentation files are installed on your computer.
|
|
|
If Change License was selected earlier (for an existing installation), make sure that all the relevant product check boxes are selected. If the new license adds products that were not included in the original installation and the check boxes for those products are not selected, the license information will be correct but the software components needed to use the products will be missing.
|
|
-
|
If Add/Remove Products and Reinstall or Change License was selected in Step 2, the Products page includes a Reinstall selected and installed products check box. Select this to reinstall selected products that are already installed.
|
|
|
|
6
|
Click Next.
|
|
-
|
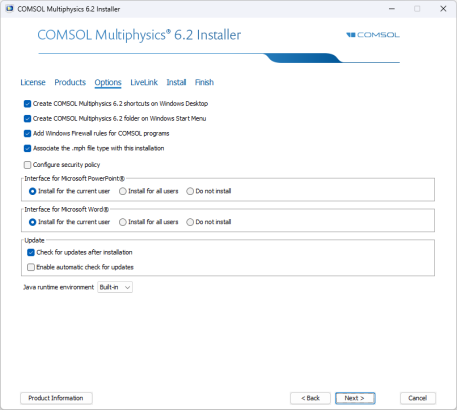
Add Windows Firewall rules for COMSOL programs. This check box adds firewall rules that allow COMSOL server programs to open ports and communicate over the network. If you clear this check box, you might get a warning from the Microsoft Firewall when you start a COMSOL server program, or a COMSOL server program might not work as expected.
|
|
-
|
Associate the .mph file type with this installation. If this check box is selected, you can open COMSOL models by double-clicking them.
|
|
-
|
Configure security policy. If you select this option, the next page in the installer provides security options that you can either set permanently or as user defaults; see Security Page. If you set a permanent security policy, the security settings in the Preferences dialog box will be read-only.
|
|
-
|
For the interface to Microsoft PowerPoint®, which makes it possible to interactively update PowerPoint presentations with COMSOL images and tables, you can choose Install for the current user (the default), Install for all users, or Do not install.
|
|
-
|
For the interface to Microsoft Word®, which makes it possible to interactively update Word documents with COMSOL images and tables, you can choose Install for the current user (the default), Install for all users, or Do not install.
|
|
-
|
Check for updates after installation. This option is selected by default. The installer will apply all available updates (if any) for the installed version.
|
|
-
|
Enable automatic check for updates. Select this check box if you want COMSOL to automatically check for available product updates at startup.
|
|
-
|
By default, COMSOL 6.2 uses an included Java 11 runtime, indicated by the Built-in setting in the Java runtime environment list. If you want to run COMSOL with another Java 11 runtime that you have licensed and installed, specify its location in the Location field by first choosing Custom.
|
|
8
|
Click Next.
|
|
|
|
-
|
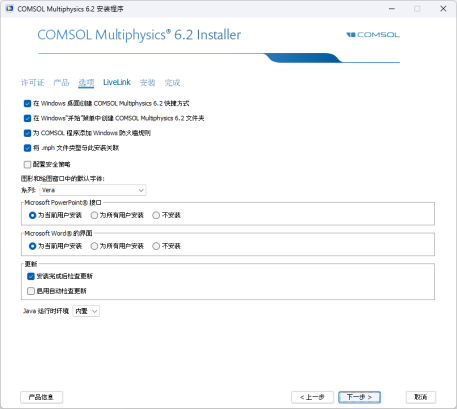
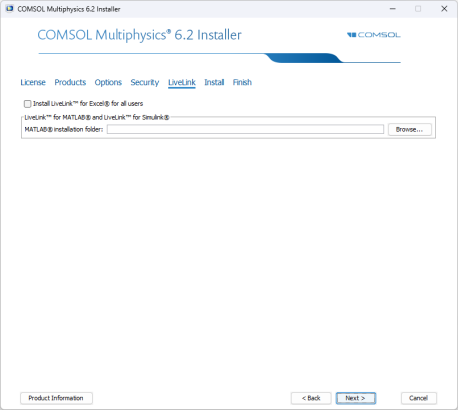
Install LiveLink™ for Excel® for all users. If you select this check box, the installation of LiveLink™ for Excel® is global to the machine and is available no matter which user is logged on. Otherwise, the installation is only available to the current user.
|
|
-
|
For the products LiveLink™ for MATLAB® and LiveLink™ for Simulink®, specify the path to the MATLAB installation folder.
|
|
10
|
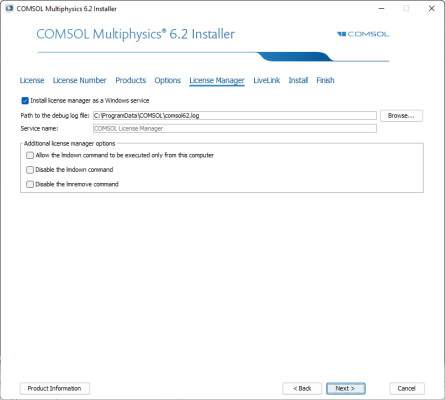
The License Manager page appears if the installer installed the FlexNet license manager and your computer is designated to run the license server. If this page does not appear, you can manage the license server using LMTOOLS; see Starting the License Manager. This page contains the following options:
|
|
-
|
The Install license manager as a Windows service check box is selected by default; if you clear the check box, the license manager must be started manually and will not be available as a Windows service.
|
|
-
|
The Path to the debug log file field contains a file path to the location of the license manager debug log file. Click Browse to choose another file path.
|
|
-
|
The Service name field shows the service name, for information only.
|
|
-
|
The Additional license manager options section contains the following options:
|
|
11
|
|
-
|
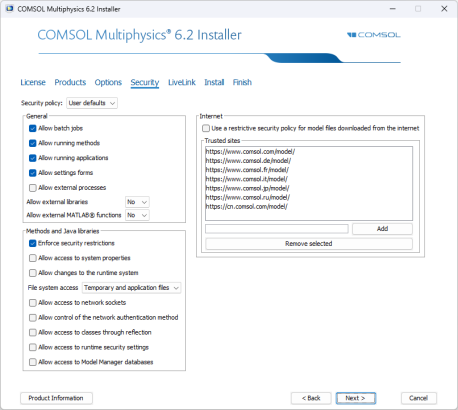
Select the Allow batch jobs check box to allow batch jobs. This restriction affects the Batch, Batch Sweep, Cluster Computing, and Cluster Sweep nodes in the COMSOL Desktop model tree.
|
|
-
|
Select the Allow running methods check box to allow running applications that include methods. If you clear this check box, it is not possible to run methods in applications.
|
|
-
|
Select the Allow running applications check box to allow running applications in general. If you clear this check box, it is not possible to run any applications.
|
|
-
|
Select the Allow settings forms check box to allow settings forms and dialog forms in the Model Builder. If you clear this check box, an error message appears if you try to create a new settings form or show a dialog form.
|
|
-
|
Select the Allow external processes check box to allow applications to start external processes on the computer. This includes using the built-in executeOS() method.
|
|
-
|
From the Allow external libraries list, select No (the default), Yes, or Ask to control if external C libraries can be called from methods in an application, either directly or by asking first.
|
|
-
|
From the Allow external MATLAB® functions list, select No (the default), Yes, or Ask to control if functions written in MATLAB (requires LiveLink™ for MATLAB®) can be called, either directly or by asking first.
|
|
-
|
Select the Allow access to system properties check box to read and write system properties. For example, System.getProperty("cs.np") can be used to determine how many cores COMSOL Multiphysics is currently using.
|
|
-
|
Select the Allow changes to the runtime system check box to allow methods and Java libraries to change the runtime system — for instance, by modifying class loaders.
|
|
-
|
From the File system access list, select Temporary and application files (the default) to restrict methods and Java libraries to only have access to such files, or select All files to allow methods and Java libraries to access all files that you have permissions to access on the file system.
|
|
-
|
Select the Allow access to network sockets check box to allow methods and Java libraries to open sockets for network access.
|
|
-
|
Select the Allow control of the network authentication method check box to allow methods and Java libraries to control the network authentication method used.
|
|
-
|
Select the Allow access to classes through reflection check box to allow access to all members in a class through reflection.
|
|
-
|
Select the Allow access to runtime security settings check box to allow methods and Java libraries to access security settings.
|
|
-
|
Select the Allow access to Model Manager databases check box to allow methods and Java libraries to access Model Manager databases, including both reading and writing data.
|
|
12
|
Click Next.
|
|
13
|
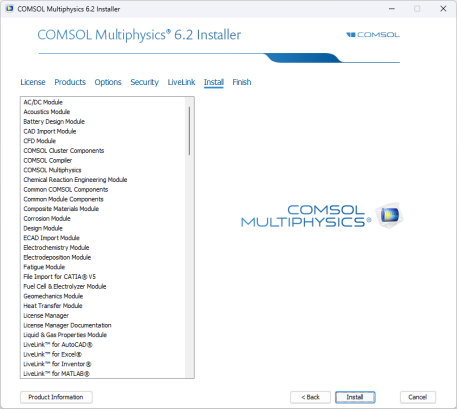
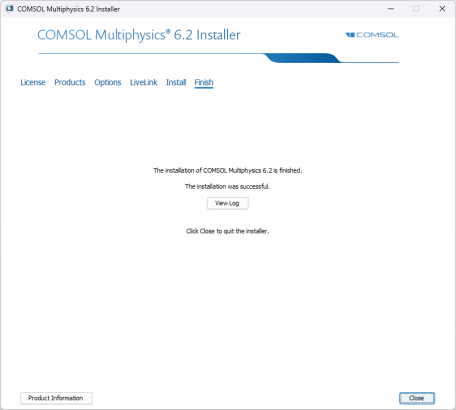
When you click Install the utility will install or update COMSOL. The installation process can take several minutes. If you are installing over the internet, the installation time depends on your internet connection speed. The Finish page in Step 13 appears when the installation process is finished.
|
|
15
|
Click Close to quit the installer.
|