Meshing the Geometry
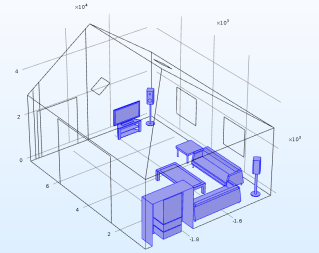
The following steps show how to create an unstructured tetrahedral mesh for the geometry using custom mesh size parameters on the faces for the furniture in the room. A mesh suitable for a simulation may be different from the one generated by following the steps below.
1
In the Mesh toolbar click Free Tetrahedral
.
2
In the Mesh toolbar click Normal
to add a Size attribute to the Free Tetrahedral 1 node.
3
In the Settings window for Size select Boundary from the Geometric entity level list.
4
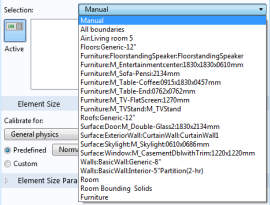
Expand the Selection list.
The list of available selections includes the boundaries for the room bounding and furniture elements that were synchronized from the Revit project. The union selections created earlier in model are also available. In this case assume that to resolve the smaller boundaries of the furniture the Size 1 attribute node should apply to the Furniture selection.
5
From the Selection list select Furniture.
6
Click the Custom radio button.
This allows the individual tuning of the mesh parameters. Change the maximum and minimum element size to more suitable values.
7
In the Element Size Parameters section select the Maximum element size checkbox and enter
100[mm]
.
8
Select the Minimum element size checkbox and enter
20[mm]
.
9
Click Build All
.
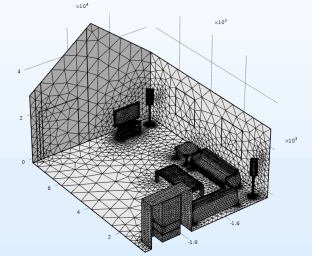
10
To get the view below click the Click and Hide
button in the Graphics toolbar, then click on the boundaries that obstruct the view to hide them. When done, click Hide and Select again to activate selection, instead of hiding, when clicking on the geometric entities.