An alternative approach is to call the function mphnavigator that displays the model object information in a MATLAB
® GUI. To run the function at the MATLAB prompt, enter the command:
When starting mphnavigator without any arguments it will use the model stored in the
model variable. If the COMSOL model objected is not stored in the MATLAB variable
model enter the command:
where <modelvar> is the variable name in MATLAB that contains the model.
The appearance and behavior of the mphnavigator window depend on the version of MATLAB. Using MATLAB version 2020a or newer will show an updated user interface based on App Designer. These user interfaces can be resized and in many cases support a faster workflow compared to previous versions.
In the File menu you will find file handling commands such as
Open and
Save as to load a new model object in the COMSOL Multiphysics server and update the Model Object Navigator window and save the current model object in the MPH-file format, respectively. If you want to visualize the current model object in the COMSOL Desktop, click
Launch COMSOL Multiphysics. Click
Show model thumbnail to show the model thumbnail in a separate window.
In the Tools menu you will find additional functionality to inspect the model. Click
Plot to displays the geometry, the mesh, or a plot group in a MATLAB figure. This button is only active when one of the corresponding node in the model tree is selected. Select
Search to open the
Model Search window where you can search for expressions or tags in the model object (see
Finding Model Expressions). Select
Solutions to open the
Solution Info window that displays the solution object available in the COMSOL Multiphysics model object. Select
Warnings and Errors to list the error or warning nodes available in the model object (see
Handling Errors and Warnings). Click
Add report (also accessible with the shortcut icon

below the menu list) to generate a report node in the model; you can choose between brief, intermediate, or complete reports. Select
Write report (also accessible using the icon

) to write a report, which has been previously added to the model, in a document. This opens the
Run Report window where you can specify the report node to run and the report settings such as the filename and the output format.
where <feattag1> and
<feattag2> are the feature tags to reach the selected feature in the model.
In the Options menu you can set some preferences for the
Model Object Navigator window.
Select Automatic update to get the model tree and properties automatically updated as the current model object is changed. A manual update can be achieved by clicking

in the toolbar.
Select Use component syntax to include the component in the COMSOL API command. To get the property value as a string when clicking the
Copy get button, select
Get property as string. You can also select
Show name to display the node name in the model tree instead of the tag node only.
The Help menu you can get the help of a selected node in the model tree (
Help button or

) as well as the corresponding API help (
API Help button or

).
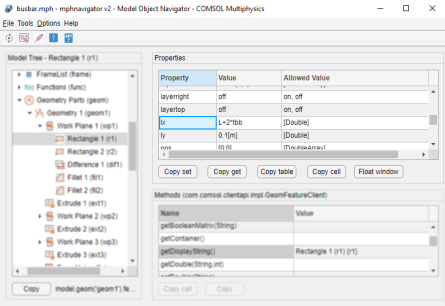
The Model Tree section has the list of the nodes of the model object. Use the scrollbar to the right to scroll down the list and click the + icon to expand the model object feature nodes.
The Properties and the
Value columns list the properties of the selected feature node and the associated values respectively. The
Allowed Value column list the allowed value for the corresponding property.
Click Copy set, or
Copy get, to copy to the clipboard the command that sets the selected property to its current value, respectively get the value of the currently selected property. Click
Copy Table to copy the entire properties table to the clipboard, then paste into a text or spreadsheet editor. To copy a selected cell in the table, click
Copy. Using the
Float window button you can open the Properties table in a separate window.
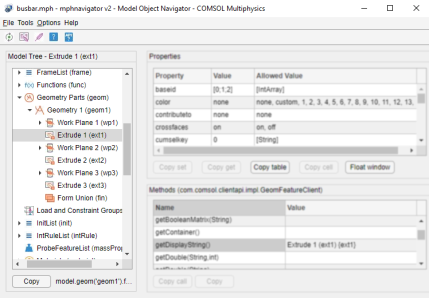
The Methods section lists all the methods associated to the feature node selected in the Model Tree section
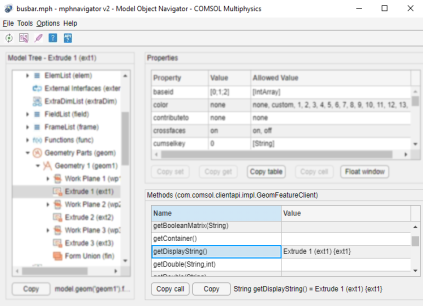
Select a method in the list to get its associated syntax at the button of the Methods section. Use the
Copy button to copy the syntax to the clipboard. Click
Copy call to copy the method syntax associated to the selected feature node, the syntax is ready to use at the MATLAB prompt.