Drawing the Bracket
1
From the Sketch tab, select Polygon (
).
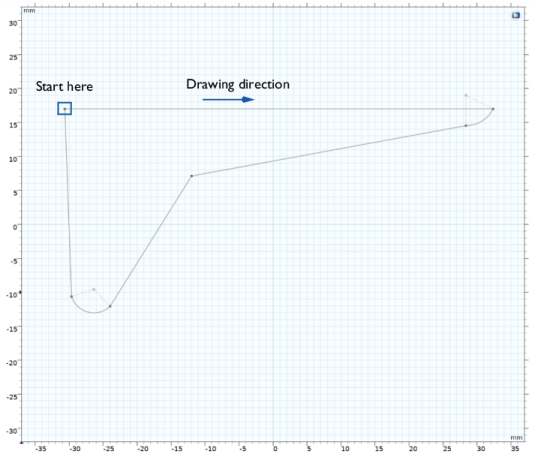
2
In the Graphics window click to start drawing the bracket. Start at the corner highlighted below, and draw the first segment in the direction of the arrow.
3
Move the pointer to the right, and at the end of the first edge where the circular arc starts click once to place a vertex.
4
To switch to drawing a circular arc, right-click in the Graphics window, then from the context menu choose Circular Arc (
), then choose Start, Center, Angle.
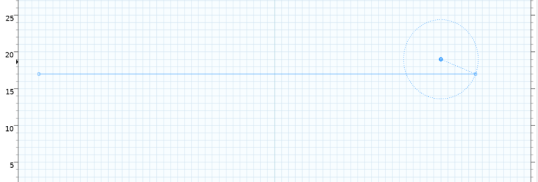
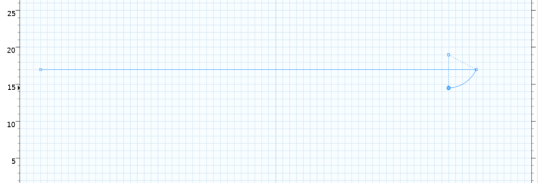
5
As you move back the mouse pointer to the Graphics window, the preview of the drawing indicates the center of the arc. Click to place it according to the figure below.
6
Move the mouse to form the arc, then click to place a vertex where the arc ends.
7
Right-click, then from the context menu choose Polygon (
) to continue with the next straight edge.
8
Continue to draw the bracket. Click to place the end vertices of the segments, and switch to the Circular Arc tool when needed for the second arc. Try to create a sketch that resembles the drawing under Step 2 above.
9
To close the shape, position the last vertex on top of the first vertex, then click to place it, the shape will be closed automatically.
When finished, the Composite Curve 1 node is added to the geometry sequence. This node contains the two polygon and circular arc features that you have drawn. Collecting several features into a composite curve ensures that the end points are always coincident, so that no additional constraints are needed.
10
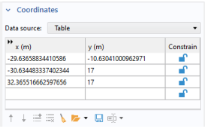
Under Geometry 1, expand the Composite Curve 1 node, then click Polygon 1. The settings for Polygon contains a table with the point coordinates you have just drawn.
In sketch mode you can modify the polygon by dragging the edges and vertices in the Graphics window.
11
Drag an edge or vertex on the canvas. Before constraints and dimensions are applied to the sketch it is possible to move the entities without any restrictions. To restore the geometry click the Undo (
) button, or press Ctrl+Z.
Another way to modify the polygon is by editing the values in the coordinates table. The Constrain (
) button next to the coordinates locks the vertex so that it is not possible to drag it in the Graphics window. The coordinates that are constrained this way become
built-in dimensions
and are not possible to modify by constraint and dimension features. For this example, leave all coordinates unconstrained as you will continue with applying constraints and dimensions to obtain the final shape of the bracket.