In the model tree, the Export node may contain several types of subnodes for file export, including:
The Settings window for each of these nodes contains an
Output section with a field for
Filename. The figure below shows the
Settings window for an
Export >
Plot node.

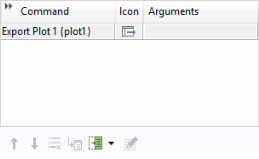
You can leave the Filename field blank, as shown in the figure above. In the command sequence of, for example, a button, you can run the corresponding
Export >
Plot node and, at run time, it will open a file browser window for the user to select a location and filename. A command of this type is shown in the figure below.
While developing an application, you may need to use the Model Builder repeatedly to check the exported data. In this case, you can use the Filename field for a file used for testing purposes and, by selecting the
Always ask for filename checkbox, a file browser will still be opened at run time.
In a similar way to the Export subnodes, each
Report subnode has a
Format section with a
Filename field, as seen in the figure below.
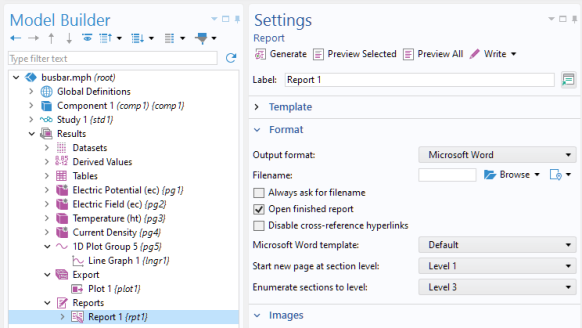
By running a Report subnode, a file browser window is opened for the user to select a location and filename for the report.
Some applications may need to produce temporary files, and this is accomplished by using the temp:/// file scheme. The temporary files are stored in a random temporary directory, which is unique for each started application instance. These files are deleted when the application is closed. Temporary files can be produced by command sequences or methods, or output to be saved on the client when used with COMSOL Server.
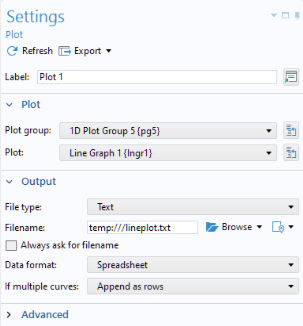
The example below shows the Settings window of an
Export >
Plot node that is used to export plot data as numerical values.
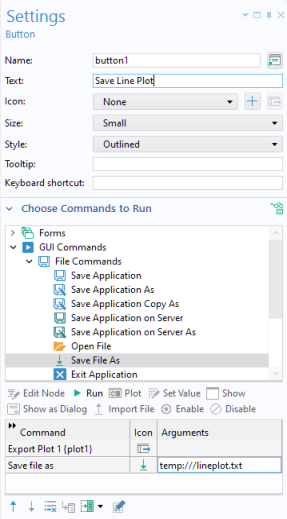
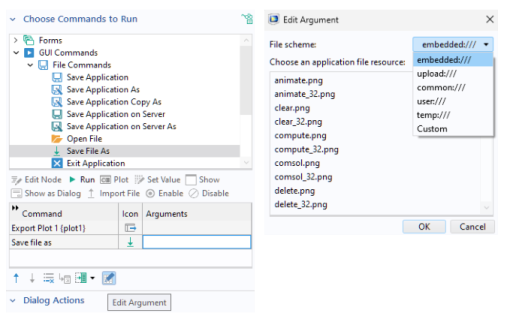
To make it possible to save the plot in this example, a button is created. In the Settings window for the button, in the section
Choose Commands to Run, first create the output graph file by choosing the
Export >
Plot node created above and clicking
Run. Second, choose
GUI Commands >
File Commands >
Save File As and click
Run again.
In the Output section of the button
Settings, set the filename to the name of the temporary file created by the
Export Plot command, in this case,
temp:///lineplot.txt.

The
Save File As command provides a dedicated
Edit Argument dialog with easy access to all embedded files as well as shortcuts for all file schemes.
Note that as a first step, in the example above, the file is written to a temporary file, using the call to model.result().export("plot1").run(). This step is done automatically by the application. In the second step, the method
fileSaveAs opens a file browser and lets the user of the application choose the file location, for example, a folder on the computer’s local file system or to a network folder. This extra step is needed in order for the application to function in a web browser. Due to the security settings of a typical web browser, the application is not permitted to automatically save a file to an arbitrary location. Instead, the application is allowed to save to a few specific locations including the temp folder, whose location is specified in the
Preferences window settings. The other locations are the
user and
common folders, also specified in the
Preferences settings.