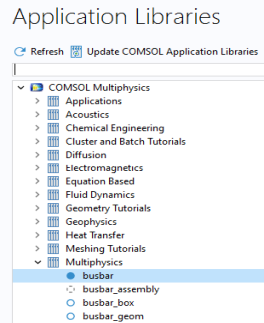
Running Methods in the Model Builder
Running methods in the Model Builder is similar to calling methods from applications with the most important difference being that from the Model Builder methods can directly modify the model object in the current session. Running methods from the Model Builder can be used to automate modeling tasks that consist of several manual steps. For example, in a model with multiple studies, you can record code for the process of first computing Study 1; then computing Study 2, which may be based on the solution from Study 1; and so on, with customized code in between the calls to Study 1 and Study 2.
From the Model Builder you can call methods directly through Method Calls or using the options available in the Developer tab in the ribbon, described later in this section. You can call methods indirectly through Settings Forms, for example, by calling a method at the click of a button. For more information on Settings Forms, see Using Forms in the Model Builder.
In contrast to methods that are called from applications, methods called from the Model Builder cannot use built-in graphics methods such as printGraphics, useGraphics, and zoomExtents. This restriction is due to the fact that a Settings Form cannot include a graphics object.
Methods called in the Model Builder may have input and output arguments. Input arguments to such methods that are called directly, and not indirectly from a Settings Form, are given by adding a Method Call node under Global Definitions, see Method Calls.
Controlling Which Model Tree Node Should Be Active
To control which model tree node should be active after running a method in the Model Builder you can use the built-in method selectNode. For example, a method modifying the geometry can have as its last line of code:
selectNode(model.component("comp1").geom("geom1"));
which will display the geometry and select the Geometry node.
The method selectNode has no function when used in an application.
Generating a Report Automatically after Computing
As an example of using a method from the Model Builder, consider the process of first computing the solution and then generating a report. This can be automated by first recording the corresponding operations in the Model Builder and then running a method.
Let us start from the busbar example described in the book Introduction to COMSOL Multiphysics. You can load this example MPH file from the Application Libraries, as shown in the figure below.
Open the model.
In the model tree, right-click the Reports node under Results.
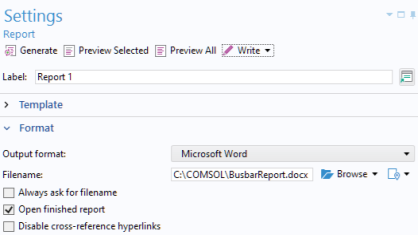
Select Brief Report.
Change the Output format to Microsoft® Word (this example would also work with the default HTML format).
Click the Browse button and select a filename in a location on your system where you have write permissions, for example
C:\COMSOL\BusbarReport.docx
Click Write to generate and save the report to file.
Close the Microsoft® Word document that was automatically opened. (This functionality is controlled from the Open finished report checkbox.)
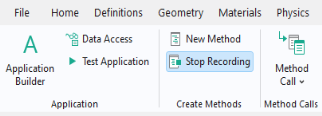
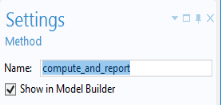
Click the Developer tab in the ribbon (of the Model Builder) and click the Record Method button. Click OK in the dialog that opens, to confirm the method name method1.
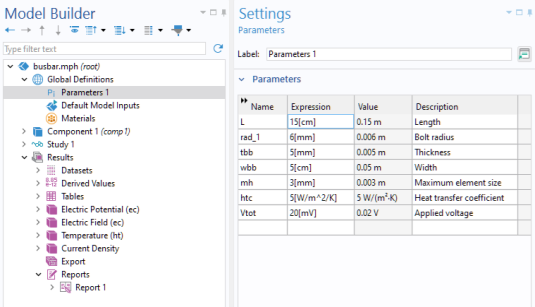
In the model tree, right-click the Study 1 node and select Compute (or use the ribbon option for Compute).
In the model tree, right-click the Report 1 node and select Write (if prompted to overwrite, answer Yes). Close the Microsoft® Word document that was automatically opened.
Click the Developer tab in the ribbon and click the Stop Recording button.
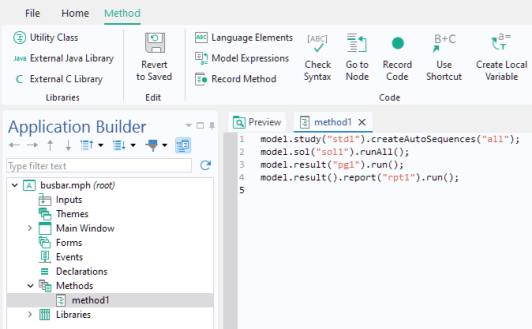
You can now switch over to the Application Builder, by clicking on the Application Builder button in the ribbon, and see the recorded method in the application tree and in the Method Editor.
For more information on code generated from the Study node, see the Application Programming Guide.
Go back to the Model Builder by clicking on the Model Builder button in the ribbon.
In Global Definitions > Parameters 1, change the Length to 15[cm].
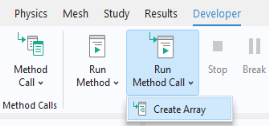
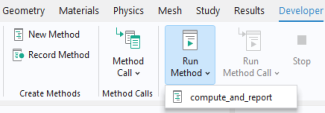
In the ribbon, click on the Developer tab and select compute_and_report from the Run Method menu (if prompted to confirm, answer Yes).
Depending on your security settings, you may get an error message. To avoid this error, open File > Preferences, go to the Security page, and change File system access to All files. You can change this back to its default setting after running this example.
Note that you can create multiple methods and call them from the Model Builder.
Method Calls
A call, in the Model Builder, to a method for a specific set of input argument values can be made by adding a Method Call node under Global Definitions. To add a Method Call node, right-click Global Definitions and select one of the methods that you have created. The figure below shows a Method Call to a method for creating a geometric array.
The user interface layout of a Method Call cannot be customized. Instead, for customizing use a Settings Form, see Using Forms in the Model Builder.
You can run, stop, or edit a Method Call by clicking the corresponding toolbar button in the Settings window, as shown in the figure below.
This functionality is also available from the Developer tab in the ribbon of the Model Builder, as shown in the figure below.
The figure below show the corresponding method’s Settings window in the Application Builder with the definitions of the input arguments.
You can add multiple Method Call nodes for the same method where each call can contain a different set of input argument values.
There is no direct way of using output arguments from a method in the Model Builder. However, you can use calls to the built-in method message to display variables used in a method in the Messages window in the COMSOL Desktop environment. The following example shows how to display the value of two double variables width and depth in the Messages window:
message("Width: "+toString(width));
message("Depth: "+toString(depth));
For debugging, you use the general techniques outlined in the section Debugging.
For reusing a Settings Form between sessions, you can create an Add-in. For more information, see Creating Add-ins.