|
1
|
|
2
|
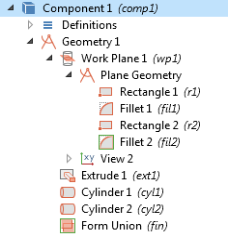
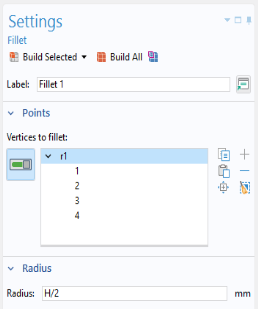
On the object r1, select Points 1,2,3,4 only.
|
 and enter the information in the Selection text field. In this example for the Fillet 1 node, enter 1,2,3, 4 in the Paste Selection window. For more information about selecting geometric entities in the Graphics window, see the COMSOL Multiphysics Reference Manual.
|
-
|
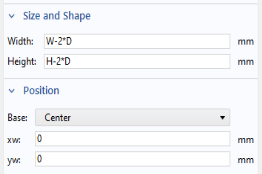
Width text field, enter W-2*D.
|
|
-
|
Height text field, enter H-2*D.
|
|
2
|
On the object r2, select Points 1,2,3,4 only.
|
|
3
|
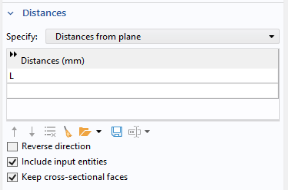
Go to the Settings window for Extrude. Under Distances from Plane in the table under Distances (mm), enter L in the column (replace the default).
 |
|
-
|
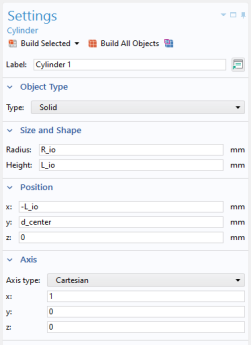
Radius text field, enter R_io.
|
|
-
|
Height text field, enter L_io.
|
|
4
|
|
-
|
Radius text field, enter R_io.
|
|
-
|
Height text field, enter L_io.
|
|
4
|
Under Position in the y text field, enter -d_center.
|
 and select Parameter 1
  .
. .
. .
.
 .
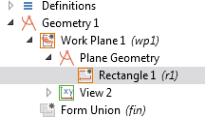
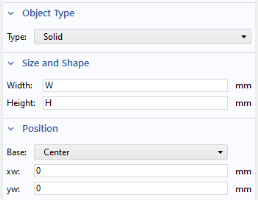
. and add a Rectangle
  .
.
 .
.
 and choose Rectangle
  .
.
 .
. in the Settings window or Home toolbar.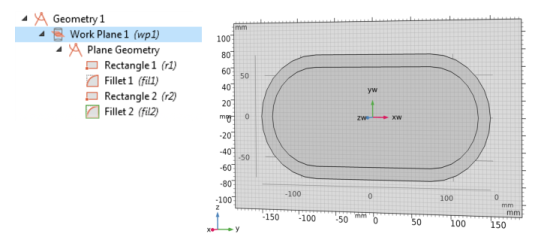
 .
. .
. .
.
 .
. In the Home toolbar. Click the Zoom Extents button
  in the Graphics toolbar.