|
•
|
|
•
|

|
•
|
Enter a Light Intensity or use the slider to select values. Watch the changes in the Graphics window at the same time to help choose a level. When adjusting the light intensity, the light marker changes in length as the corresponding intensity is changed on the object.
|
|
•
|
Enter a Specular intensity (the intensity of the light that reflects off the surface of the geometry and used to define spheres and curves). This setting is turned ON and OFF on the View page (the default is ON), and the levels are adjusted for each Specular intensity using the field or the slider to select values between 0 and 1 (default value: 1). Watch the changes in the Graphics window at the same time to help choose a level. See Figure 6-20 for an example of specular light.
|
|
•
|
Select a Color: White (default), Custom, Black, Blue, Cyan, Green, Magenta, Red, or Yellow. If you select Custom, click the Color button to choose a color from the Custom color palette.
|
|
•
|
By default, the Lock to camera coordinate system check box is selected to make the light rotate together with the camera. Click to clear as needed; the light then follows the geometry.
|
|
•
|
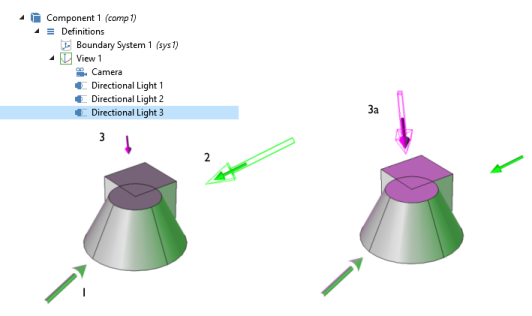
By default, the Show light marker check box is selected. The light marker is associated to the type of light applied to the object. See Figure 6-21 for examples. Click to clear the check box as needed and remove the marker from the Graphics window.
|
|
•
|
By default, the Cast shadows check box is selected. The directional light will then cast shadows when the direct shadows are active (requires the OpenGL renderer, optimized for quality). Clear the check box if you do not want the light to cast shadows.
|