You are viewing the documentation for an older COMSOL version. The latest version is
available here
.
Connecting a Layered Material to the Physical Geometry
After creating the layered material definition, the next step is to attach the layer definition to the physical geometrical surfaces. The most fundamental way of doing that is through a
Layered Material Link
node, which you add under the
Materials
node within a component.
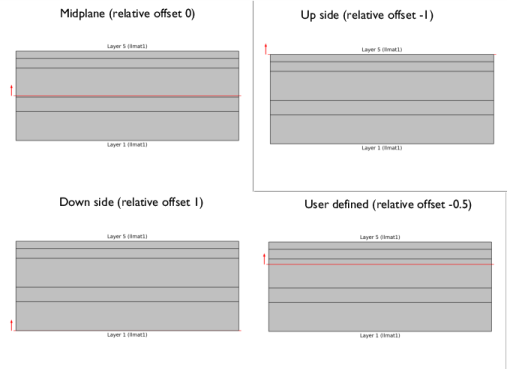
In that node, you select the boundaries where you want to attach the layer definition. The position of the geometric boundaries with respect to laminate definition is also defined. You can attach the boundary to the laminate midplane, down side, up side, or at a user defined location as shown in
Figure 3-8
.
Figure 3-8:
Position of geometric boundaries with respect to the composite laminate.
It is also possible to use some of the transform options while attaching the layer definition to the boundaries. By default, the layer definition is used as it is however it is possible to use the following transform options:
•
Symmetric
•
Antisymmetric
•
Repeated