Creating a New Material Library and Adding and Editing Materials
When you first open the Material Browser, an empty User-Defined Library is available for you to start creating your own library of materials (see Figure 9-1). These steps describe how to create a copy of the existing library, rename it, and then add materials to the empty library.
Creating a User-Defined Material Library
1
In the Materials toolbar, click Browse Material .
2
-
Click the New Material Library button () under the tree.
-
3
In the New Material Library dialog box, navigate to the folder on the computer where the empty User-Defined Library database is located. The location of the file varies based on your installation. For example, if the installation is on your hard drive:
-
The file path on Windows might be similar to C:\Users\Your_Name\.comsol\v54\materials.
-
-
On macOS, it is typically <home folder>/Library/Preferences/COMSOL/v54/material (if missing, click the Finder’s Go menu and hold down the Option key to show the Library folder). You can also search for the filename User_Defined_Library.mph.
4
Right-click the User_Defined_Library.mph and select Copy. Right-click in the window and select Paste.
5
6
Click the new material library filename and then click Save. The empty database, with a new name, is added to the Material Browser.
7
Click Done .
Adding A Predefined Material to the User-Defined Material Library
Add any predefined material to a Component node in the Model Builder. There are different ways to add the material to the Model Builder as well as to the Material Library.
Using the Material Browser
1
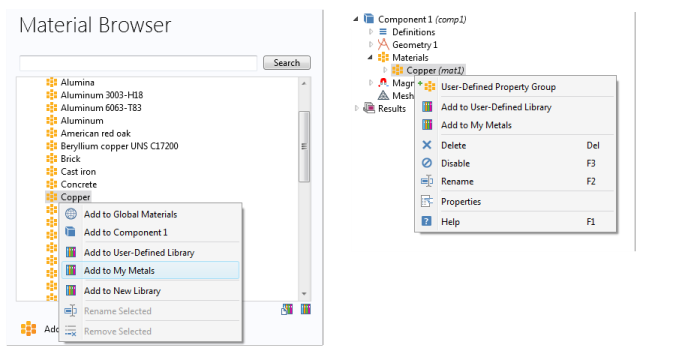
To open the Material Browser, right-click the Materials node and select Browse Material , or in the Materials toolbar, click Browse Material .
2
Right-click the material to add, Copper for example, and select Add to My Metals (or any other material library available).
Figure 9-14: Adding a predefined material to a new user-defined library using the Material Browser (left) and after adding a material to the Model Builder (right).
You can also duplicate a material node to start with the defined material properties for that material and then modify some of them to match some similar material that you want to add.
Using the Add Material Window
1
In the Home or Materials toolbar, click Add Material to open the Add Material window.
2
Locate the material you want to add, Copper for example, and click Add to Component.
3
In the Materials toolbar, from the Add to Library menu, select Add to <material library name>. Or in the Model Builder, right-click Copper and chose an option. See Figure 9-14.
Adding a Blank Material to a Material Library
1
In the Materials toolbar, click Blank Material . An empty Material node is added under Materials in the Model Builder.
2
3
In the Materials toolbar, from the Add to Library menu, select Add to <material library name>. Or in the Model Builder, right-click Material and chose an option. See Figure 9-14.
4
Right-click the Material node to Rename Selected material to a more meaningful name.
Editing Materials in a User-Defined Material Library
To edit materials in a user-defined material library, open it in the COMSOL Desktop as any other MPH-file. The MPH-file for a user-defined material library contains its materials only (under Global Definitions>Materials). You can then edit and modify any aspect of the material in that user-defined library, such as the values of some material properties. When you are done, save the MPH-file for the user-defined material library (under the same name and in the same location). Then restart the COMSOL Desktop to load the updated materials from the user-defined material library.
Removing a User-defined Material from a Material Library
In the Materials toolbar, click Browse Material to open the Material Browser. Locate the material to remove. Right-click the material and select Remove Selected ().