The Add Material Window
The Add Material window is similar to The Material Browser Window. It has the same material libraries available but does not include the detailed properties about each material. The number of material libraries depends on which COMSOL Multiphysics products your license includes. See About the Material Databases for information about available material databases. This window is a quick way to add materials to models.
To open the Add Material window :
From the Materials toolbar, click Add Material.
Right-click the Materials node () and select Add Material from Library.
As in Figure 9-4, you can browse all the available material databases or search for specific materials. There is also a Recent Materials folder where you find the most recently used materials. Search a specific material by name (or, for the Material Library product, by UNS number or DIN number).
Figure 9-4: The Add Material window. In this example, Air is selected from the Built-In library and can be added to the Material node in the Model Builder.
Adding Materials to a Component
You can add materials to Component nodes using either the Add Material or Material Browser windows. In either window, use the Search field to find materials by name, UNS number, or DIN number. Or click any of the folders and subfolders to locate and add a specific material. For example, from the left column, click Built-In and in the right column, click Air.
Using the Add Material Window
1
Open the Add Material window (see The Add Material Window).
2
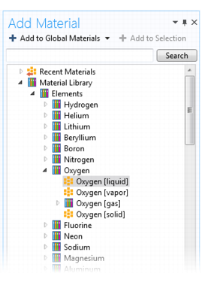
In the Add Material window, select a material by phase (liquid, vapor, gas, or solid) and orientation/variation, when available.
3
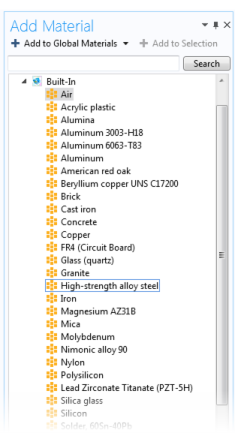
Click the Add to Component or Add to Selection buttons, or right-click the material and select the same options from the context menu. If there is more than one Component in the model tree, add the material to the applicable geometry.
-
Click the Add to Component button to add the material to the active component in the Model Builder and then make it an active material in the domains (or other geometric entities) where it is selected. You can also click the menu button to the right of Add to Component and select Global Materials to add it under the global Materials node, select any of the components in the model to add it to its Materials node, or select Add to Switch 1, for example, to add it under a Switch node for materials under the global Materials node. Right-click the Material node to rename it, for example, using the name of the material it represents.
-
For Add to Selection, the material is added to the geometric entity chosen in the Graphics window and a new node is added to the Model Builder. This is a method called preselection and once the second node is added, the first node displays (overridden) in the selection list.
Using the Material Browser Window
1
Open the Material Browser window (see The Material Browser Window).
2
In the Material Browser, select options from the Phase and Orientation/variation lists, when available (only included for some materials in the Material Library product). In this window you can review the material Properties and Input sections.
3
Click the Add to Component button () under the list of materials to add the selected material to the current model component. Alternatively, click the Add To button () to add the material to any available model component or to an existing or new user-defined material library. You can also right-click the selected material node to add that material to a model component or user-defined material library. Materials that you have selected to add to any of the model components appear in the Added to model list.
4
Click Done () to add the materials to the model tree in the Model Builder and close the Material Browser. If it is the first material in that model component, the material in the Model Builder becomes the default material; otherwise, the material is initially not used anywhere but becomes the active material in the domains (or other geometric entities) that you pick to add to that material’s selection list.